How to print a Test Page in Windows
Using the Test Page function is a good way to test the communication between the printer and computer. It is sent directly from the printer driver and thus enables a user to determine if the problem is related to a communication issue or an actual problem with the application that is being used.
Follow the instruction appropriate for your version of Windows:
Windows 11
-
Open Printers & Scanners, click here for instructions.
Before continuing, do the following:
- Check the connection from the printer to the computer.
- Check the printer is powered on.
- Make sure there are no red or amber lights on the printer's LEDs or error messages on the LCD panel.
-
Printers & Scanners will open. An icon for your Epson printer should be present.
 Note:
Note:If an icon for your Epson printer is not present, the driver is not installed. Install the driver according to the method recommended in article Epson and Windows.
- Click on the name of the printer
- In the Printers folder, first check that the print queue is clear and the printer is Ready. Click here for further instructions
- Click or tap on Printer properties. The printer properties window opens on the General tab.
- Load a sheet of plain A4 paper into the sheet feeder/paper cassette.
-
Click or tap on Print Test Page.
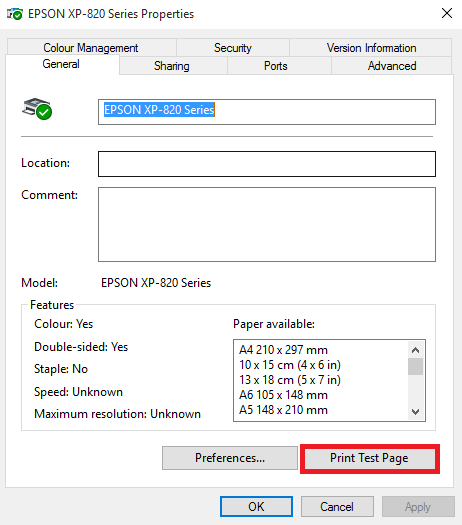
-
A Test Page will be sent to the printer and the following window will appear. If the Test Page prints successfully click or tap Close.
-
An example of a successful Test Page is below.

Windows 10
-
Open Devices and Printers, click here for instructions.
Before continuing, do the following:
- Check the connection from the printer to the computer.
- Check the printer is powered on.
- Make sure there are no red or amber lights on the printer's LEDs or error messages on the LCD panel.
-
The Devices and Printers folder will open. An icon for your Epson printer should be present.
 Note:
Note:If an icon for your Epson printer is not present, the driver is not installed. Install the driver according to the method recommended in article Epson and Windows.
- In the Printers folder, first check that the print queue is clear and the printer is Ready. Click here
-
Right-click or tap and hold on the printer icon and left-click or tap on Printer properties. The printer properties window opens on the General tab.
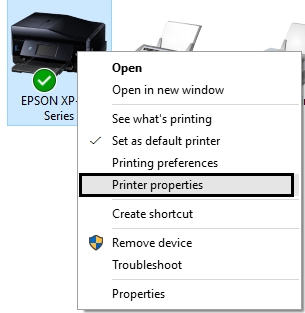
- Load a sheet of plain A4 paper into the sheet feeder/paper cassette.
-
Click or tap on Print Test Page.

-
A Test Page will be sent to the printer and the following window will appear. If the Test Page prints successfully click or tap Close.
-
An example of a successful Test Page is below.

Video Tutorial: How to Print a Test Page in Windows 10
Windows 8
-
Move the mouse cursor to the bottom or top-right of the screen and click the Search icon (highlighted below) from the menu that appears.
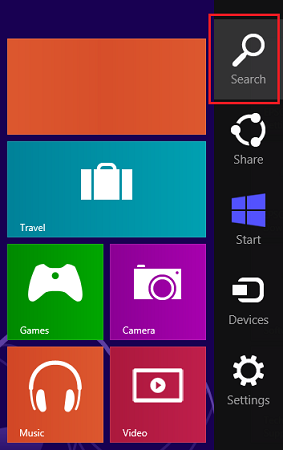
-
Type Control panel in the Search bar and press Enter.
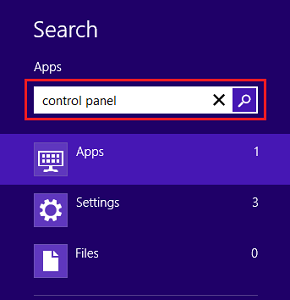
-
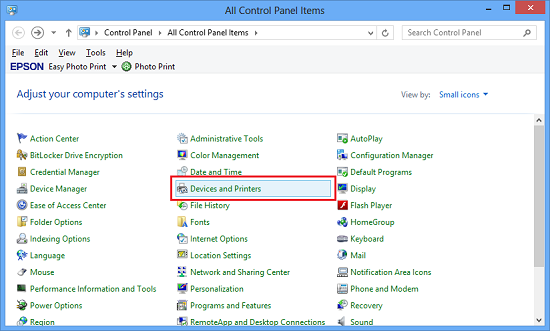
In Control Panel double-click Devices and Printers (Small/Large icon view) or click View devices and printers (Category view).
Before continuing, do the following:
- Check the connection from the printer to the computer.
- Check the printer is powered on.
- Make sure there are no red or amber lights on the printer's LEDs or error messages on the LCD panel.
-
The Devices and Printers folder will open. An icon for your Epson printer should be present.
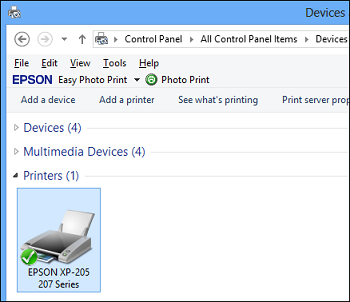
 Note:
Note:If an icon for your Epson printer is not present, the driver is not installed. Install the driver according to the method recommended in article Epson and Windows 8.
-
In the Printers folder, first check that the print queue is clear and the printer is Ready. Hover the mouse over the icon that represents your product. A pop-up window will display its status.
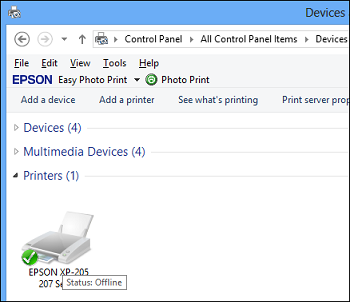
- If there are no documents waiting to print, right-click on the printer icon and left-click on Printer properties. The printer properties window opens on the General tab.
- Load a sheet of plain A4 paper into the sheet feeder/paper cassette .
-
Select Print Test Page.
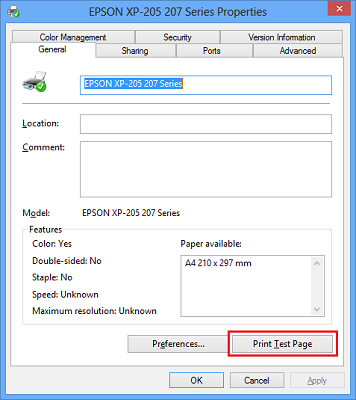
-
A Test Page will be sent to the printer and the following window will appear. If the Test Page prints successfully click Close.
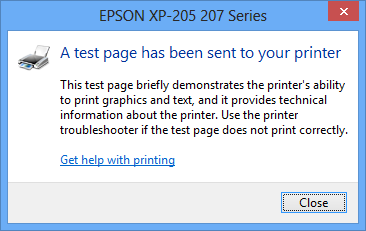
- If the Test Page fails to print you may receive a warning from the Status Monitor or notification bubble e.g. "This document failed to print" or "Communication Error".
-
An example of a successful Test Page is below:
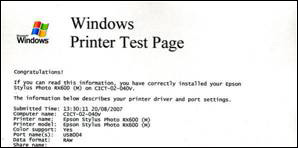
If there is banding in the text on the Test Page or the print quality is poor then head cleaning may be required.
Windows 7
-
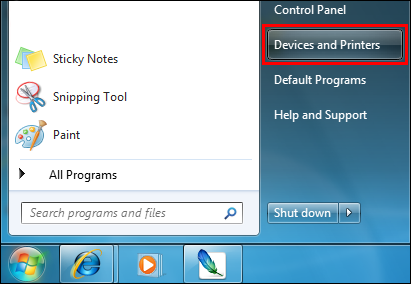
Click the
 Start button and then click on Devices and Printers.
-
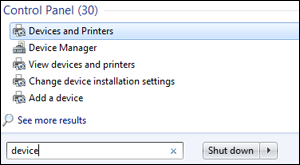
Alternatively, type device in the Start Search box and press Enter or click on Devices and Printers.

Before continuing, do the following:
- Check the connection from the printer to the computer.
- Check the printer is powered on.
- Make sure there are no red or amber lights on the printer's LEDs or error messages on the LCD panel.
-
The Devices and Printers folder will open. An icon for your Epson printer should be present.

 Note:
Note:If an icon for your Epson printer is not present, the driver is not installed. Install the driver from the Epson website.
-
In the Printers folder, first check that the print queue is clear and the printer is Ready. Hover the mouse over the icon that represents your product. A pop-up window will display its status.
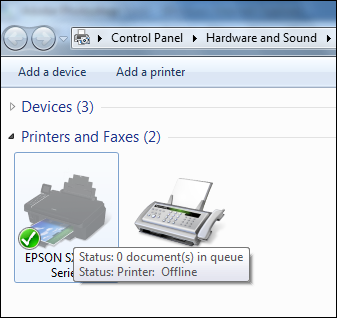
- If there are no documents waiting to print, right-click on the printer icon and left-click on Printer properties. The printer properties window opens on the General tab.
- Load a sheet of plain A4 paper into the sheet feeder/paper cassette.
-
Select Print Test Page.

-
A Test Page will be sent to the printer and the following window will appear. If the Test Page prints successfully click Close.
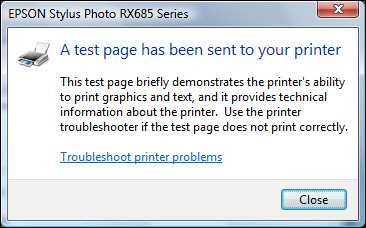
- If the Test Page fails to print you may receive a warning from the Status Monitor or notification bubble e.g. "This document failed to print" or "Communication Error", see Troubleshooting Printer-related Communication Issues in Windows.
-
An example of a successful Test Page is below:

If there is banding in the text on the Test Page or the print quality is poor then head cleaning may be required.