How do I select the 'Black Ink Only' or 'Grayscale' print mode?
To print in 'black'/monochrome you will need to follow the instructions below.
We recommend that you close any open applications from which you intend to print before following these steps so that the settings will be updated in these applications.
Follow the instructions for the operating system you are using:
Windows 10/8/7
-
Open the printers folder.
- If you require help with this step, see the following Related Article: How to open the Devices and Printers folder in Windows
- Right-click your Epson printer icon and left-click on Printing Preferences.
-
Printing Preferences should open on the Main tab. Follow the instruction which matches the layout of tabs at the top of the printer driver window:
-
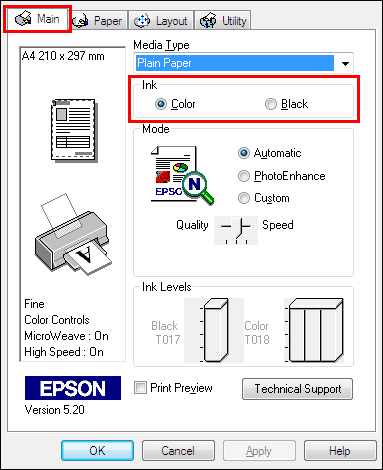
'Main', 'Paper', 'Layout', 'Utility' tabs: Under Ink, click in the radial beside Black and click OK.
- 'Main', 'Page Layout', 'Maintenance' tabs: Click on the Advanced button located in the bottom right-hand corner. Click 'Continue' if prompted.
-
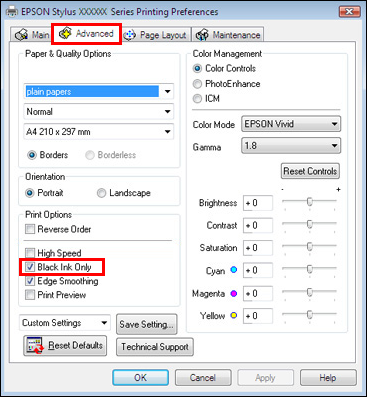
'Main', 'Advanced', 'Page Layout', 'Maintenance' ('Shortcuts') tabs: Click on the Advanced tab.
'Black Ink Only' or 'Grayscale' is on the left of this screen. Click into this check box to tick it and click OK to save these settings.
 Note:
Note:
- Any changes made in this manner i.e. entering the Properties via the printers folder, will be saved as the default settings unless changed. If you want to print in colour in the future, you will have to revert the changes.
- For help with resetting the printer driver to the default settings, see the following Related Article: How to change or reset the default printer driver settings (Windows)
- Any changes made in the printer Properties/Printing Preferences via an application you are printing from will be for that print job only or only for that session in the application. Subsequent prints will use the default printer driver settings unless these are changed again.
-
'Main', 'Paper', 'Layout', 'Utility' tabs: Under Ink, click in the radial beside Black and click OK.
Mac OS X
- Open the application you wish to use and click File then Print.
-
Use the third pull-down menu (normally headed Copies & Pages) to select Print Settings.
- For 10.5 - OS X Leopard, you can select this from the menu headed by the application name e.g. Text Edit, iPhoto. Click on this, then click on Print Settings.
-
Here you will have the option to select either Black or Color. Click on the Color pull-down menu.

-
Select Black, check the other settings are suitable for the document, and then print.

If you wish to save these settings you can create a 'Preset' - select 'Save As' from the Presets list and enter a name for your Preset e.g. Black Ink Only. Your printer will now be fully configured to print in black, providing this Preset is selected each time.
|
|
|---|
|
You will not be able to obtain black ink only printing if any cartridges have run out. This is to ensure that air is not sucked into the print head (instead of the ink that prior to the cartridge running out was available) therefore potentially damaging the printer. In order to function, the printer will require black and colour ink cartridges to be inserted with a certain amount of ink in each cartridge. |