Fixing TM-Receipt WebConfig “Privacy Error” under Windows
This document details a simple fix for the “Privacy Error” problems encountered when accessing the WebConfig pages of the following products/interfaces from a Windows PC:
- TM-T88VI-UiB, TM-T88VI-iHub.
- TM-m30, TM-m10;
- TM-P80, TM-P60II, TM-P20; *
- UB-E04, UB-R04. *
*These products support only SHA-1 at this time. Some browsers may return an error for cryptographic hash functions below SHA-256.
Connecting to the onboard “Webconfig” using a modern browser will result in a “privacy” or “security” error unless the proper security configuration has already been applied.
While it may be possible to navigate past this error, this can be inconvenient as the message will have to be bypassed each time you need to access WebConfig.
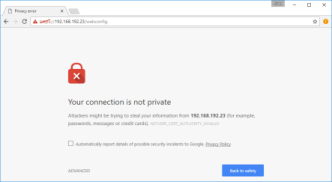
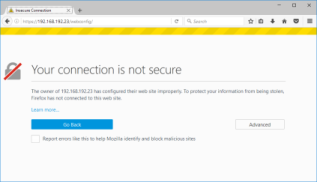
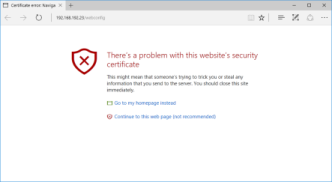
Below are examples of the error you may receive when trying to access WebConfig.| Google Chrome | Firefox | Microsoft Edge |
|---|---|---|
 |
 |
 |
In recent years, the creators of web browsers have worked to make their offerings more secure.
This impacts Epson TM-R printers since the WebConfig pages must now be set up with a certificate that is correctly configured for each printer, and registered as “trusted” in the Windows environment.
The below steps will provide a solution to the problem of repeated warning dialogs in the Windows environment.
This example assumes that a static IP address has already been assigned to the printer, and the PC is able to access the printer via this IP address. In this example, we use the IP address 192.168.192.120.
Google Chrome
- Open Google Chrome
- Enter the printer's IP address in the URL bar
-
A warning message will be presented
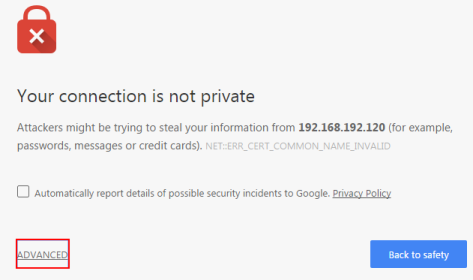
-
Click Advanced

-
Once expanded, a link will be present at the bottom of the dialog box as shown below.
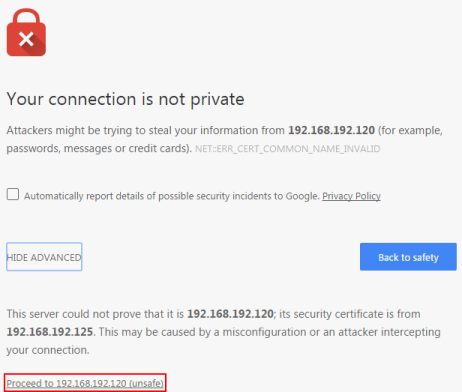
- The browser warns that this is unsafe. Click this link to proceed to the WebConfig pages.
-
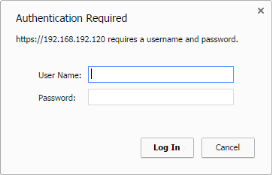
A dialog box will prompt for the username and password for WebConfig. Input the user name and password for your printer. The default user name is epson, the default password is epson.
-
Click SSL/TLS on left hand menu in the WebConfig page.

-
Under Self-signed Certificate click Create.

-
Type the printers IP address in the Common Name box

- Change the validity period to the desired length.
- Click Create.
-
Click Reset to complete the process, this will reset the printer.

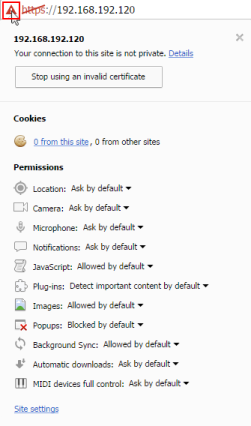
- In the URL bar, a warning triangle with an exclamation mark precedes a struck-through ‘HTTPS’.
-
Click on the warning triangle to reveal a dialog box.
-
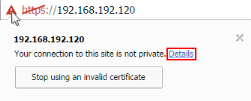
Click Details to open the Security Overview pane.
-
Click View certificate to open the certificate details.
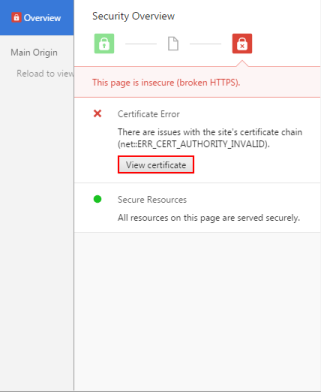
-
Make sure the IP address next to Issued By is the same as the printers IP address.

- Click the Details tab.
- Click Copy to file.
- Follow the wizard to export the certificate as a DER encoded binary X.509 (.CER).
- Open Control Panel.
-
Click Internet Options.
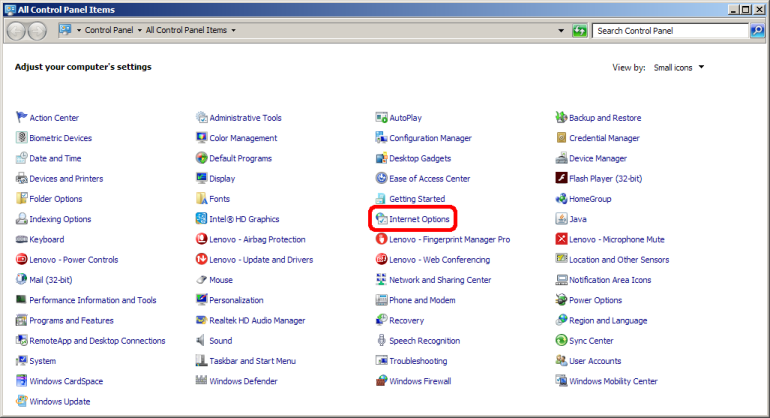
- Select the Content tab.
-
Click Certificates
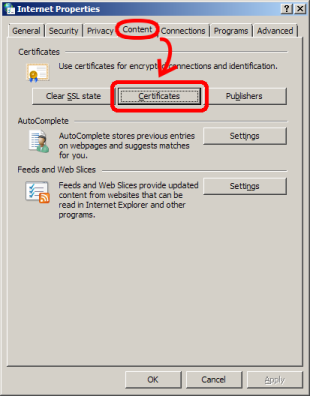
- Click Trusted Root Certification Authorities tab.
-
Click Import.
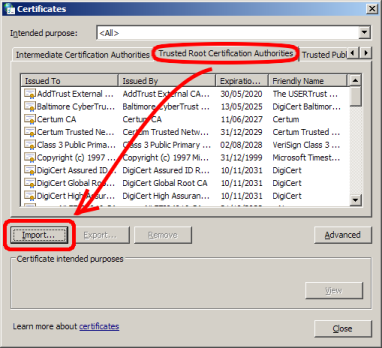
- Follow the wizard to import the created certificate to the Trusted Root Certification Authorities store.
- Restart any open web browsers.
- Enter the printers IP address into the browser URL bar.
-
The URL bar should now show a green padlock icon.

Firefox
- Open Firefox
- Type the IP address of the printer in the URL box.
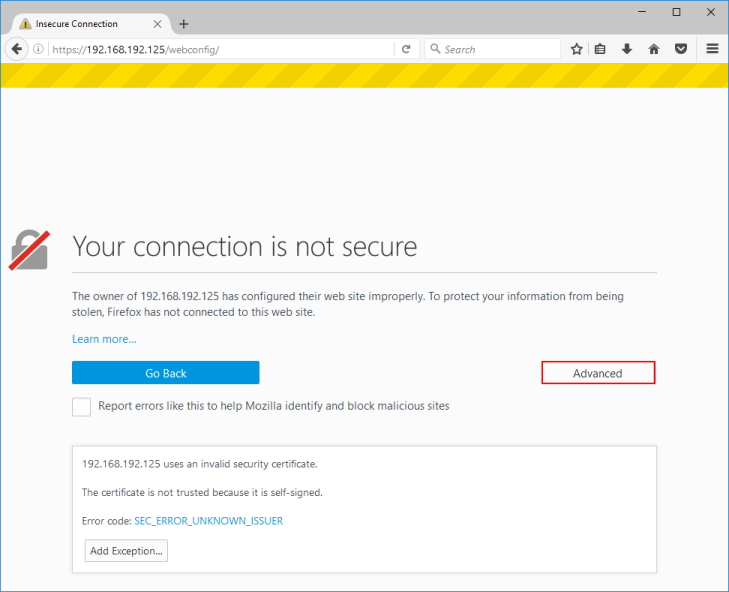
- A error warning will be displayed.
-
Click Advanced.
-
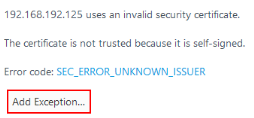
Click Add Exception.
-
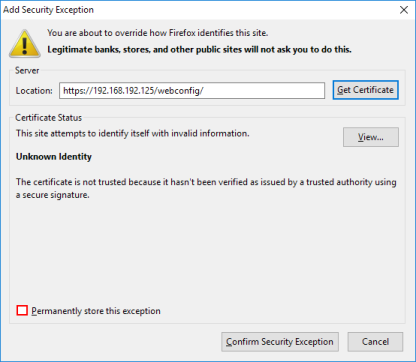
Uncheck Permanently store this exception.
-
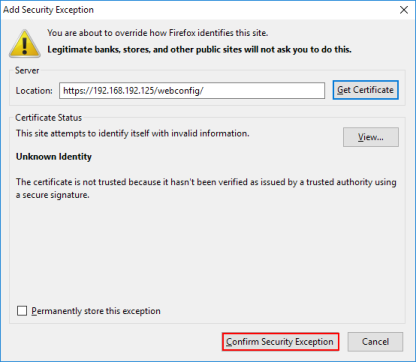
Click Confirm Security Exception.
-
Click the padlock icon in the URL bar.
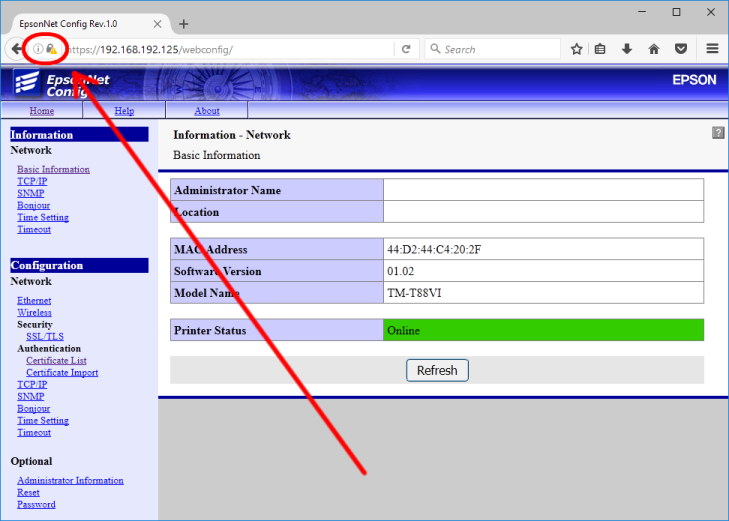
-
Click >
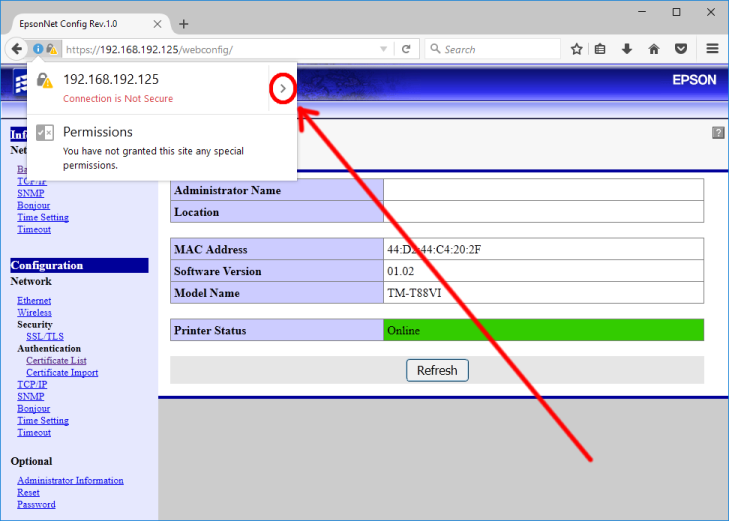
-
Click More Information
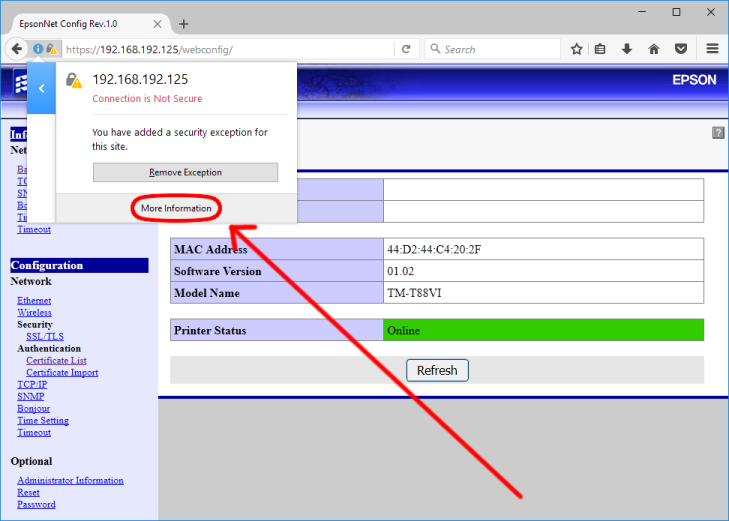
-
In the window that opens click View Certificate
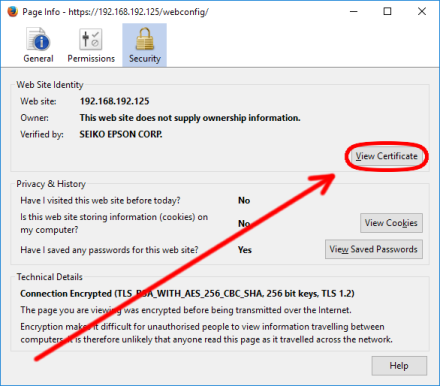
-
In the window which opens, click the Details tab.
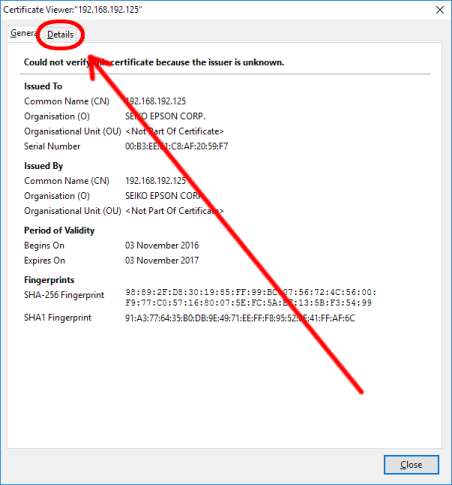
-
Click Export
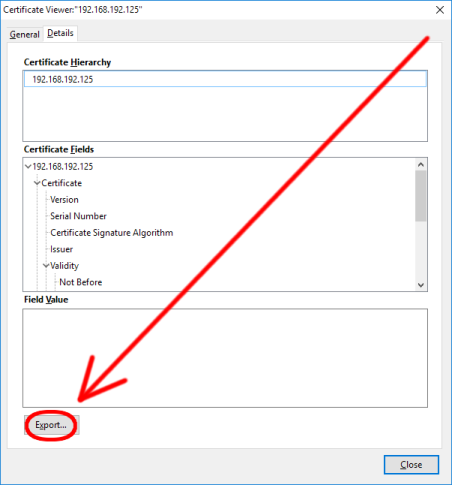
-
Save the certificate file.
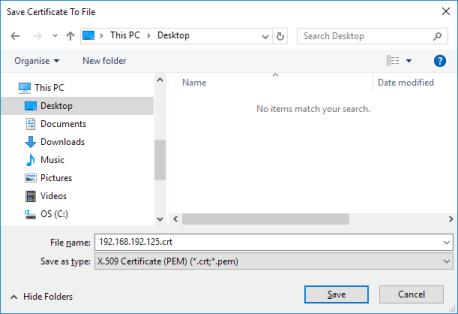
-
Make sure the IP address next to Issued By is the same as the printers IP address.

- Click the Details tab.
- Click Copy to file.
- Follow the wizard to export the certificate as a DER encoded binary X.509 (.CER).
- Open Control Panel.
-
Click Internet Options

- Select the Content tab.
-
Click Certificates

- Click Trusted Root Certification Authorities tab
-
Click Import.

- Follow the wizard to import the created certificate to the Trusted Root Certification Authorities store.
- Restart any open web browsers.
- Enter the printers IP address into the browser URL bar.
-
The URL bar should now show a green padlock icon.

Microsoft Edge
- Open Microsoft Edge
- Type the printer's IP address in the URL bar
- Press Enter
-
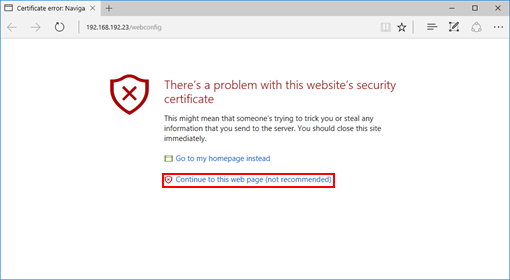
A warning screen will be presented.
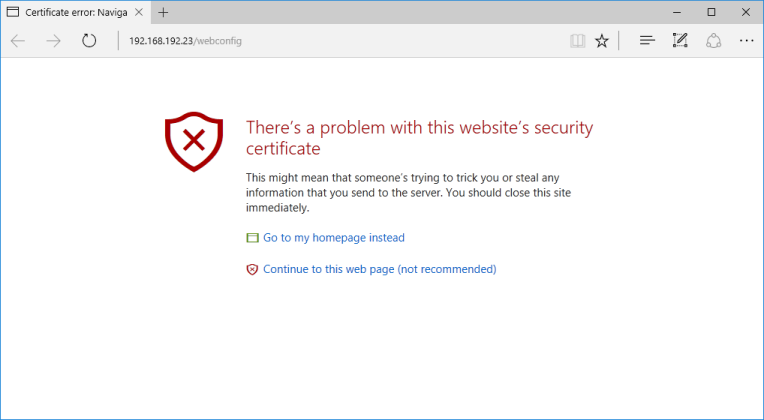
-
Click Continue to this web page (not recommended)
- Click the … icon.
- Click Open with Internet Explorer
- Click the certificate warning in the URL.
- Click View certificates.
-
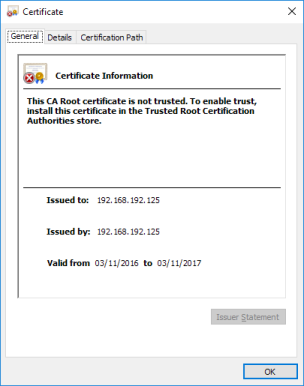
The certificates window will open.
-
Make sure the IP address next to Issued By is the same as the printers IP address.

- Click the Details tab.
- Click Copy to file.
- Follow the wizard to export the certificate as a DER encoded binary X.509 (.CER).
- Open Control Panel.
-
Click Internet Options

- Select the Content tab.
-
Click Certificates

- Click Trusted Root Certification Authorities tab
-
Click Import.

- Follow the wizard to import the created certificate to the Trusted Root Certification Authorities store.
- Restart any open web browsers.
- Enter the printers IP address into the browser URL bar.
-
The URL bar should now show a green padlock icon.
