How to use the System Configuration Utility (MSConfig) in Windows
Windows systems use a number of programs that load when Windows starts and then continue to run unnoticed in the background. Known as Startup programs, Startup items or TSRs (Terminate and Stay Resident programs), these can sometimes conflict with each other and cause performance and communication issues.
This article explains how to use the System Configuration Utility (or MSConfig) to identify Startup program conflicts in Windows 10, Windows 8 and Windows 7.
|
For troubleshooting purposes this procedure will prevent any Startup programs not critical to Windows from loading when you start your computer. This may include anti-virus and other software. Disabling any and all Startup programs is at your discretion. |
- Close all applications before proceeding.
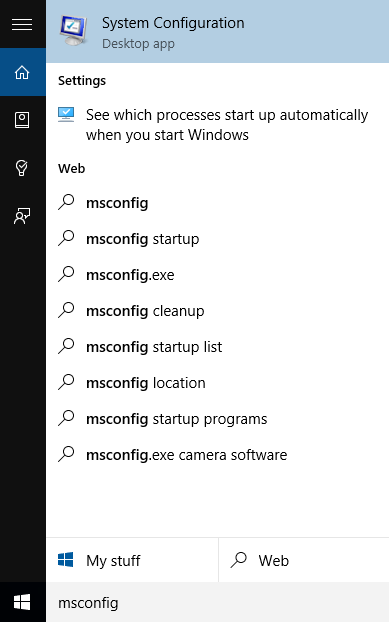
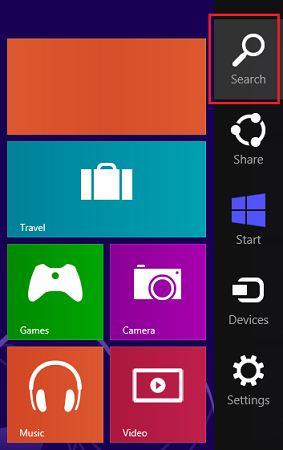
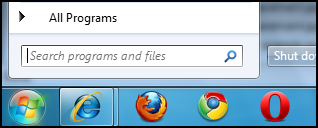
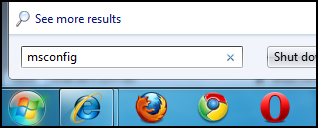
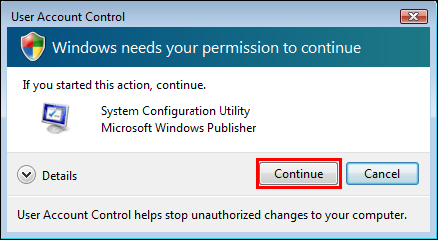
- Open the System Configuration Utility. Follow the instructions for your version of Windows:
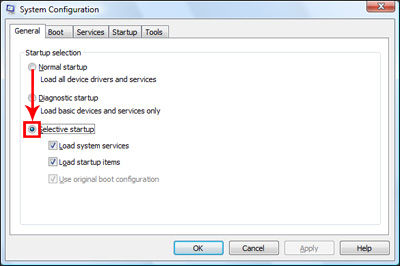
- The System Configuration Utility will open. On the General tab, click the Selective startup option as shown below.
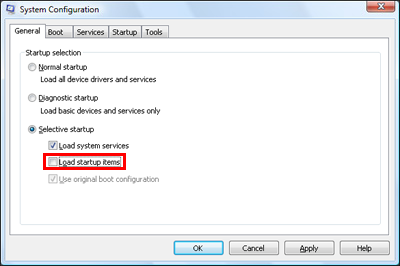
- Under Selective Startup, click in the box beside Load startup items. This will remove the tick and disable this option.
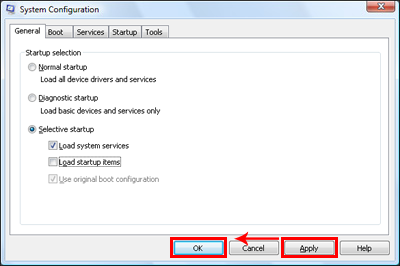
- Click Apply then OK.
- Next, click Exit without restart.
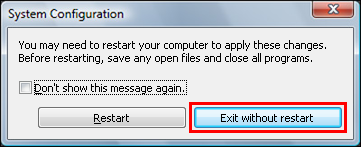
- Shut down the computer.
- When the computer has shut down completely, leave the computer off for a minute. Then power it on again.
- When Windows has loaded, you may be notified that "You have used System Configuration to make changes to the way Windows starts." Click OK to continue, then close the System Configuration window.
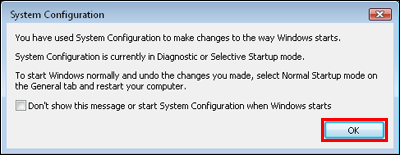
- Test your product again to see if the issue still occurs. Move to the next step only if instructed to do so.
 Tip:
Tip:If you have a printer, we recommend printing a Test Page. For help, see How to print a Test Page in Windows.
If the issue remains:
- If the issue remains then it is not caused by a Startup program conflict. Restore your system to its previous configuration as follows:
- Repeat the System Configuration Utility procedure from step 1 to step 4. At step 5, re-enable all Startup programs by clicking on the Normal startup option.
- Click Apply, then OK. When prompted to restart your computer, click Yes. Your computer will restart using your previous configuration.
- Next, either return to the previous article for further instructions or see the following article for advice on identifying the issue:
If the issue no longer occurs
- If your product now operates correctly this indicates that one of the disabled Startup programs was conflicting with it. Follow the steps below to begin a process of elimination to identify which program is causing the issue.
- If the issue remains then it is not caused by a Startup program conflict. Restore your system to its previous configuration as follows:
- Open the System Configuration Utility (see Step 2). Click the Startup tab at the top of the window.
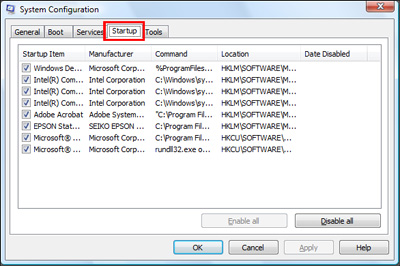
 Note:
Note:Windows 8 users, click for instructions:
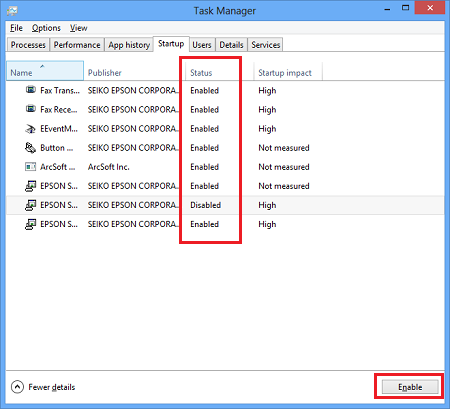
- The Startup tab will not display the startup items as in other Operating Systems, Windows 8 displays these in Task Manager.
- Click Open Task Manager.
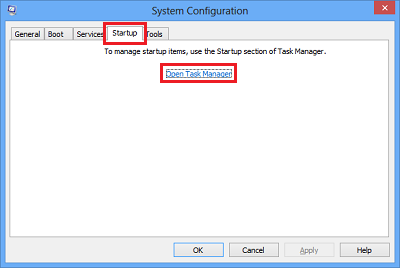
- Task Manager opens on the Startup tab. To Enable/Disable an item, highlight the item and click the Enable/Disable button (shown below). An item's status can be checked using the Status column.
Follow the instructions from step 12.
- Enable one of the unchecked items by clicking on the relevant box. We recommend that you work from the top of the list and note the item you have enabled. Click Apply, then OK and when prompted whether or not to restart your computer, click Exit without restart.
- Shut down the PC. Leave the PC off for a minute, then power it back on.
- When Windows restarts, click OK to the System Configuration notification. Test your product again, for example by printing a Windows Test Page.
If the issue now occurs
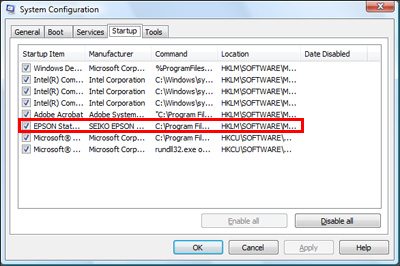
- If the issue now occurs, the Startup program you enabled is causing the conflict. We recommend contacting the vendor or manufacturer of the software for advice. The company name is often part of the filename or path:
Example of Epson (SEIKO EPSON) startup items
- Now go to Step 14 to restore your system to its previous configuration. At your discretion, you may wish to leave the program you have identified as causing the issue disabled.
If the issue does not occur
- If the issue does not occur, repeat Steps 9 - 11, each time enabling another Startup program and restarting your computer before testing your product again. By this process of elimination, you should be able to identify which Startup program is causing the issue.
 Note:
Note:If you have many Startup programs on your system, it may be more efficient to enable them in groups of five. If the issue does not occur when you test your product, you know that none of the programs you enabled are causing it.
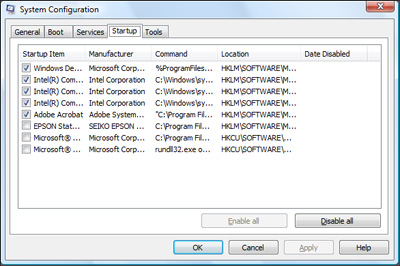
- If the issue now occurs, the Startup program you enabled is causing the conflict. We recommend contacting the vendor or manufacturer of the software for advice. The company name is often part of the filename or path:
- When required, restore your system to its previous configuration as follows:
- Repeat the System Configuration Utility procedure from Step 1 to Step 4. Re-enable any Startup programs that you previously unchecked by ticking the relevant boxes in the Startup tab window. If you have identified that one of the programs is causing a conflict you can leave it disabled, at your discretion. Click Apply, then OK. When prompted to restart your computer, click Exit without restart. Shut down the PC.
- Leave the PC off for a minute, then power it back on again. Your computer will restart using your previous configuration.
- When Windows restarts, click OK to the System Configuration notification.
- Next, either return to the previous article for further instructions or see the following article for advice on identifying the issue:

