When I try to scan, I see the error message "EPSON Scan cannot be started" in Windows. What can I do?
- Epson Scanners and All-In-Ones using EPSON Scan
- You receive the error message "Epson Scan cannot be started"
- Windows 7
The message "EPSON Scan cannot be started" is related to a communication breakdown between the Epson product and the computer. Epson Scan is both a scanning application and the scanner driver.
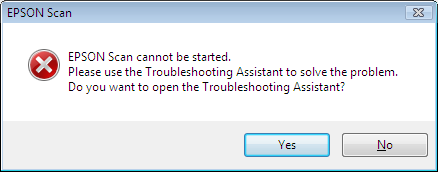
The communication problem between the scanner and the computer may be caused by various factors including the cable connection or the driver has not installed correctly. This article explains how to troubleshoot this error. If you see the dialogue below when you attempt to open Epson Scan, click No to the prompt to open the Troubleshooting Assistant.
Figure 1: Example of the error message:
First ensure that the Epson scanner/All-In-One is powered on. If you attempt to start EPSON Scan when the product is not on, you will receive this error message. Epson Scan needs to detect the product in order to be launched, as scanning is not possible unless the scanner is ready to function.
If the Epson scanner/All-In-One is powered on and you continue to receive this error message, follow the steps below to troubleshoot the issue:
|
This article applies to Epson scanners/All-In-Ones connected to a computer via a USB cable. This articles does not apply to scanners or All-In-Ones used via a wired or wireless network connection. |
Check the USB data cable connects the Epson product to the computer correctly
- Make sure that the Epson product is connected directly to the back of the computer and is not connected to a USB hub.
- Make sure the cable length is no longer that 1.8 metres.
- Try another USB cable (depending on your scanner model).
If the issue is still evident then check the Device Manager.
Check the Epson product is listed correctly in Device Manager
You can confirm that the computer is able to detect that a device is connected via the Device Manager. Follow the instructions below to open the Device Manager:
|
The Epson device will need to be turned on throughout this process. |
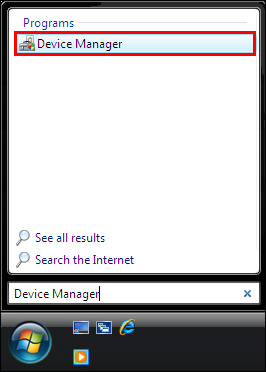
- Click on the start button to open the start menu.
- Click on to the Start Search box.
- Type Device Manager into the Start Search box.
- Windows will populate the results and Device Manager will be displayed. Click on Device Manager under the Programs result.
 Note:
Note:- Click on Continue if you receive a User Account Control permission request from Windows to open the Microsoft Management Console.
- If prompted, enter your Windows user account password then click Continue.
- The Device Manager window will now open. We recommend viewing Device Manager in the default view ('Devices by type'), as in the example below:
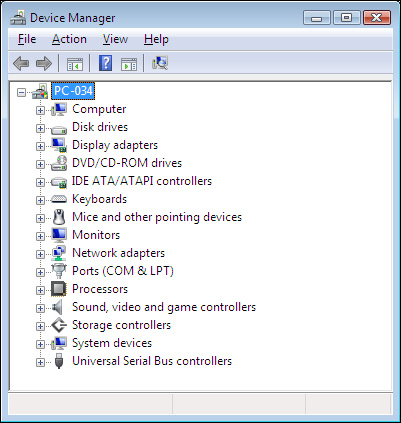
- To change to this view, click on View, and then click on Devices by type from the menu.
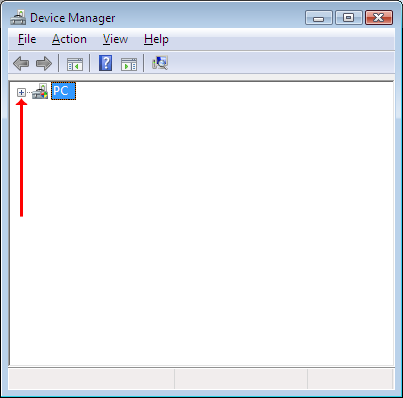
- If you see the screen below, click on the [+] plus by the computer icon to expand the list.
 Note:
Note:- If Device Manager is "empty" (not showing the computer or any devices), check that the Plug and Play service is 'Started' and 'Automatic' in services.msc. If it remains blank when this service is active, contact Microsoft for support.
- If you require assistance with this accessing Device Manager, see the following Related Article for assistance: How to access Device Manager in Windows.
- Look for a heading labelled Imaging Devices or Other Devices. Left-click on the [+] plus next to it. If a [-] minus is listed, do not click on it as the list is already expanded.
- Right-click on the entry for the EPSON Scanner, then left-click on Uninstall from the menu.
 Note:
Note:In this window, make sure that there are no Exclamation marks next to any of the options listed under Universal Serial Bus Controllers. If there are, this may be the cause of the issue and you will need to contact your PC vendor for further assistance.
- You will be prompted to 'Confirm Device Removal', to check if you wish to uninstall the product. Click OK to confirm this.

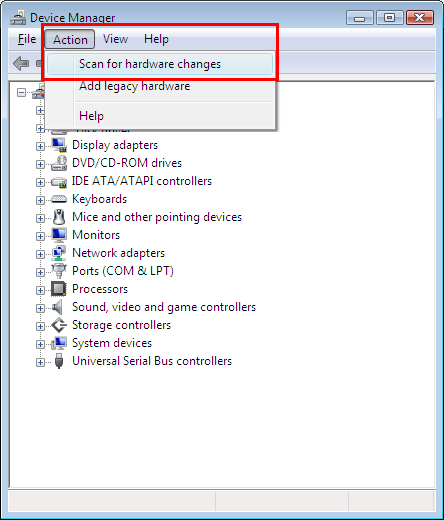
- At the top of the Device Manager window, click on Action and select Scan for hardware changes from the menu.
Once the Device Manager has scanned for new hardware, you will either see a Found New Hardware notification by the taskbar (where the clock is located) or the Found New Hardware Wizard should appear.
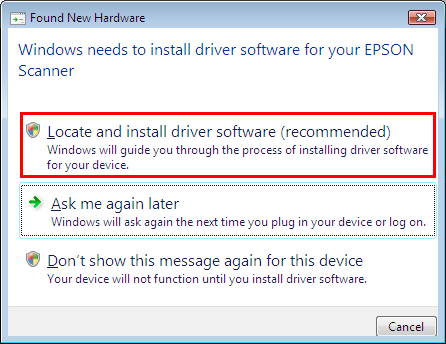
- If a window appears titled Found New Hardware Wizard, follow the instructions in the next section.
- If a Found New Hardware or Installing driver software notification appears by the taskbar, then Windows will attempt to locate and install the driver automatically. Wait a minute and then follow step c. in the next section.
Following the Found New Hardware Wizard
- If the following window appears, select the option 'Locate and install driver software (recommended)'.
The window will minimise to the taskbar and you may see a notification Installing device driver software notification.
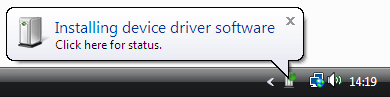
- You can view the status of the driver installation by clicking on the taskbar notification or icon.
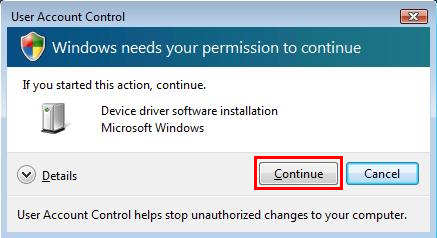
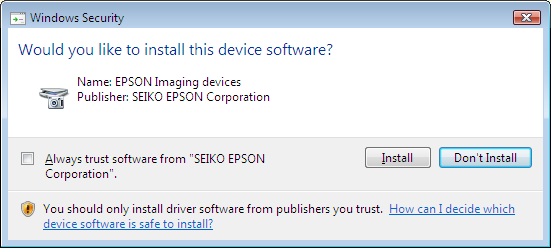
- If you receive a permission request to install the Epson device from Windows Security or User Account Control, click the option to continue and install the software.
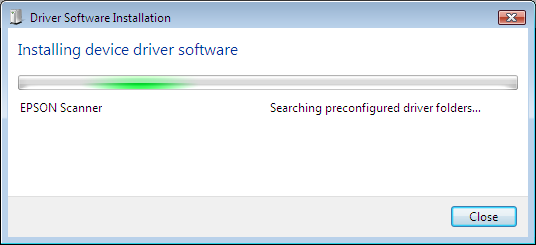
- Once the installation is complete, you should see a confirmation similar to that below (from the taskbar/progress bar):

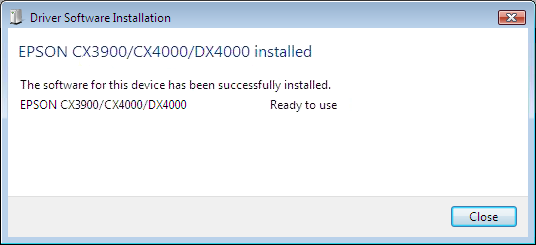
- Once completed successfully, close all active windows to return to the Desktop. If the Program Compatibility Assistant appears, click This Program Installed Correctly.
- Try to use the scanner again via start > Programs > EPSON Scan > EPSON Scan. Alternatively, launch EPSON Scan from the
 shortcut icon on the Desktop.
 - You should find it now scans without the same error message reoccurring. If you continue to receive the error message then uninstall Epson Scan from Programs and Features in Control Panel. Power off the scanner/All-In-One and restart the computer. You will then need to reinstall Epson Scan using the software CD-ROM or download it from your product's Support > Drivers & Software section of the Epson website. Once installed, restart the computer, then power on the scanner/All-In-One and attempt to use it again. For assistance, see one of the following Related Articles (Windows 7 users can refer to these for some guidance as the instructions are similar):
If the issue remains
If you experience the error after following the previous troubleshooting steps, do the following:
- Power off the Epson product.
- Uninstall Epson Scan. For assistance, see one of the following Related Articles (Windows 7 users can refer to these for some guidance as the instructions are similar):
- Restart your computer.
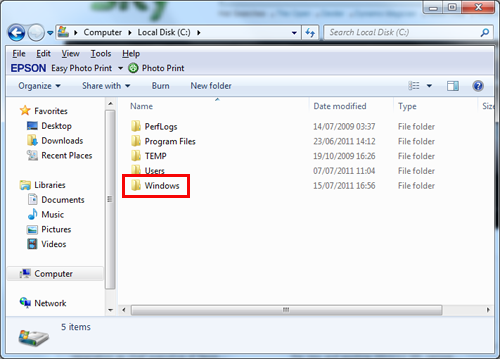
- Open Windows Explorer or Computer.
- Navigate to C:\Windows.
- Locate the Twain_32 folder and rename it to Twain_32_old.

- Restart the computer.
- Install Epson Scan. Once installed, restart the computer. After the computer has restarted, attempt to open Epson Scan again.