Print Quality Issues
Overview
This article details print quality related symptoms you may experience with your Epson device and how to solve them. Before you proceed, please make sure you have checked the following:
The ink cartridges are in date and are not damaged:
Avoid using old or damaged ink cartridges, as print quality may be reduced; especially if your ink cartridge(s) are older than 6 months. We recommend that you use your ink within the ‘Best Before Date’ printed on the retail packaging. Cartridge(s) that have been installed in your printer for longer than 6 months may start to dry out causing the nozzles of the print head to become clogged. This can result in the symptoms described within this guide.
You are using genuine Epson media:
Genuine Epson ink combined with the correct supported media for your device is essential to ensuring that you get the best possible print quality. Epson offers specially designed papers and other print media for all your printing needs.
Some third-party medias (that are not manufactured by Epson) may have a different coating which is specifically designed to work with inkjet printers that heat the ink first. If used, it can potentially result in poor print quality and colour casts. The end results from third-party media are often not favourable when compared with prints made on genuine Epson media. Epson printers are very carefully tuned to ensure Epson inks and Epson's Micro Piezo print heads produce the best quality prints using carefully selected Epson paper.
Refer to the user guide of your Epson device for a list of suitable Epson paper.
You have applied the correct driver settings:
A colour cast can also be due to incorrect driver or application settings (e.g., quality set to ‘Draft’ instead of ‘Photo’).
Before printing in Windows, you will be given the option to enter the ‘ Printer Properties’ or ‘ Printing Preferences’ within the driver (‘ Print Settings’ in Mac OS X.). This will allow you to select your required settings based on your printing needs (such as paper type and quality).
Blurry images / Smeared prints / Inconsistent colours / Blank page printed / Faded prints / Vertical or horizontal Lines
Summary
The print head has hundreds of nozzles that fire the ink directly on to the paper. If 1 or more of these nozzles become blocked, the below mentioned symptom(s) will occur.
- Missing nozzles (such as segments missing from the nozzle check pattern).
- Horizontal/vertical banding (stripes running through your documents and/or photos).
- Colour mixing.
- Blank page (the printer performs the motions of printing, but the page is blank).
Vertical misalignment or banding

Blurry, mis-aligned print

Troubleshooting
First, we need to print a nozzle check pattern to identify which colours (if any) are missing. Nozzles that are missing can easily be recovered by cleaning the print head (using the 'Head Cleaning' function) within the driver or via the control panel of your printer. For instructions on how to do this, please select the method you'd like to use:
Printer Driver
Please select your operating system:
Windows
-
On your computer:
Windows 10:
Click on the ' Start' button>’ Settings’> ‘ Devices’>’ Devices & Printers’.
Or
Start > Settings > Devices > Printers & ScannersWindows 11:
Click on the ' Start' button>’ Settings’> ‘ Bluetooth & Devices’>’ Printers & Scanners’.
Or
Use the Windows ‘Search’ function (below):

Type ‘ Printers’, and then press the ‘ Enter’ key on your keyboard -
In the ‘
Printers’ window:
Windows 10:
Right click on your ‘ Your Epson Device' >’ Printing Preferences’.
Or
Left click ‘ Your Epson Device’>’ Manage’>’ Printing Preferences’.Windows 11:
Left click ‘ Your Epson Device’>’ Printing Preferences’.
-
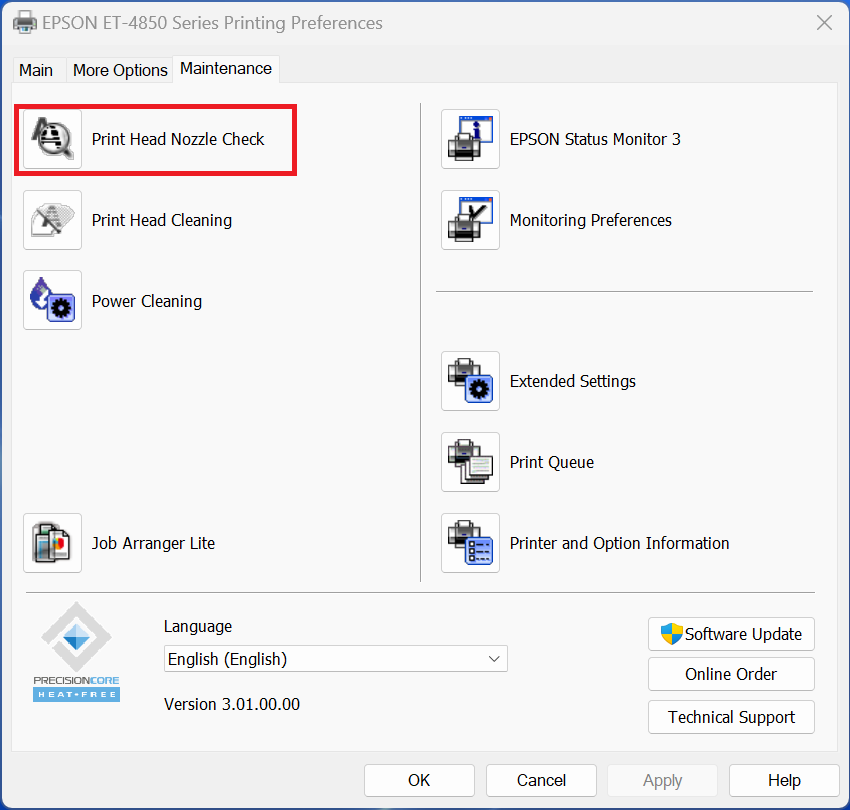
Click on the '
Maintenance' tab at the top of the driver window and select 'Nozzle Check' to print the nozzle check pattern.

macOS
- Open ‘ System Preferences’ and click ‘ Printers & Scanners’. You will now see the name of your Epson device in the printer list. Click on the name of your printer and click ‘ Options & Supplies’.
- Open the ‘ Utility’ tab, click ‘ Open Printer Utility’ and the Printer Utility window will open.
- Next, click on the ‘ Nozzle Check’ icon. The printer will now attempt to print a nozzle check pattern.
Mac OS X
- Open the EPSON Printer Utility from the Mac OS X (‘ Hard Drive\Applications’ or ‘ \Applications\Utilities’.
- Select the Epson printer in the list and the Printer Utility window will open.
- Next, click on the ‘ Nozzle Check’ icon. The printer will now attempt to print a nozzle check pattern.
Control Panel
How to print a nozzle check pattern
Home Screen > Maintenance > Nozzle Check
How to perform head cleaning
Home Screen > Maintenance > Head Cleaning
|
|
|---|
| If the print quality did not improve (there are still missing nozzles shown on the nozzle check pattern), you may need to perform a power clean. Please refer to the ‘Power Clean / Power Ink Flush’ below. |
How to a perform ‘Power Clean/Power Ink Flush’
Differences between ‘Head Cleaning’ and ‘Power Cleaning/Power Ink Flushing’
‘Head Cleaning’ is designed to resolve minor print quality issues and uses less ink than ‘Power Cleaning/Power Ink flushing’.
‘Power Cleaning’ on the other hand is designed to resolve more stubborn print quality issues that cannot be recovered using the ‘Head cleaning’ function.
When to use the ‘Power Cleaning/Power Ink Flushing’ function
If you printed the nozzle check pattern and the page comes out blank.
If the nozzle check pattern partially prints (missing segments such as Cyan & Magenta) and has not recovered after several head cleans.
For EcoTank products where you have not performed the ink charge, or you notice that the ink tubes are empty.
Important
- To prevent unnecessary ink consumption, it is recommended to perform head cleaning first.
- ‘Power Cleaning’ will not be possible if the ink level(s), or the remaining capacity of maintenance box is insufficient.
- If print quality does not improve after several head cleans, we recommend trying a power clean after waiting at least 12 hours without printing since your last ‘Head clean’.
- A single power clean is usually enough to resolve print quality related issues.
- You may also need to use the power cleaning function if you printed some documents/photos when the ink levels were too low to be seen in the ink tank windows.
To prevent nozzle clogging
- Always use the power button to turn the printer off and check that the power light is off before unplugging the power cable.
- If there is a power outage, ensure to turn the printer back on and then off again. If the printer is not turned off correctly, the print head will not be capped and ink may dry out causing nozzle clogging.
Before you begin
- If you’re product comes with a carriage lock, ensure that it is in the ‘Unlocked’ position.
- Print a nozzle check pattern to determine if a ‘Power Clean/Power Ink Flush’ is required.
- Makes sure that there are no warning or error lights on the control panel of the Epson device; otherwise, cleaning will not be possible.
- For EcoTank models, visually check that all ink tanks are at least a third full. Low ink levels may damage the product.
- For ink cartridge models, ensure that there is sufficient ink levels via the maintenance option of the control panel, or the ‘Status Monitor’ via the ‘Maintenance’ tab of the driver.
- After performing the power clean, wait at least 12 hours before printing a nozzle check to confirm the result.
- If you require further information, please refer to the user’s guide for your product.
Power Cleaning Instructions
Via the control panel of the Epson device, navigate to the following menu:
Home Screen > Settings > Maintenance > ‘ Power Cleaning’ or ‘ Power Ink Flushing’.
|
|
|---|
| Once the ‘Power clean / Power ink flushing’ has completed, wait at least 12 hours before printing a nozzle check pattern to confirm the result. If print quality has not improved, repeat this process again. |
If symptoms did not improve
If the nozzle check pattern does not improve after running an additional ' Power Clean', contact Epson for further support.
If the nozzle check pattern was recovered, but you still experience print quality symptoms, we recommend performing a head alignment. Expand the section below for instructions:
Head Alignment
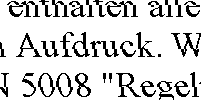
A head alignment test is run when the quality of print has declined, there would be evidence of images being blurred and not aligned correctly (such as the image shown at the start of this article above).
See one of the following articles for help, or your user guide for further information:
How do I use the Print Head Alignment utility in Windows?
How do I use the Print Head Alignment utility in Mac OS X?
